How To Fix Plaster Walls
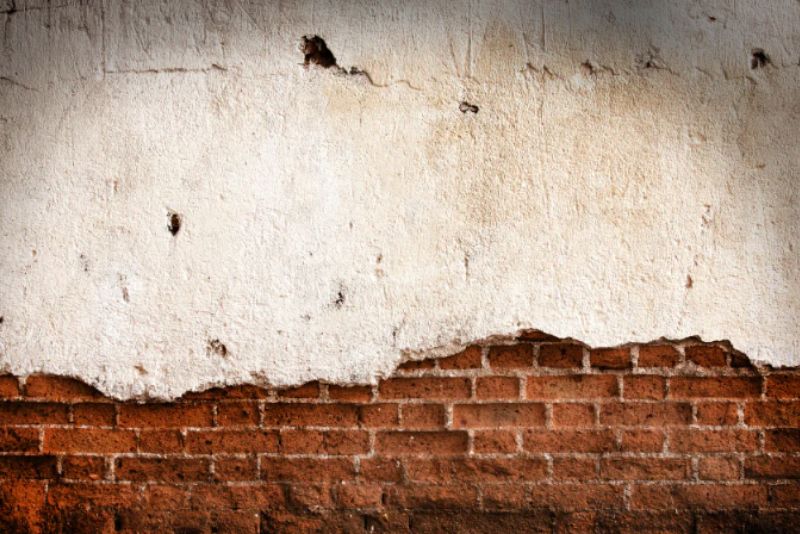
Plaster walls add a timeless charm to homes, but they can suffer from cracks and damage over time.
Understanding the causes, such as age, moisture, and structural movement, is crucial for effective repairs.
This guide will cover the necessary preparations, repair methods, and tips for a successful plaster wall restoration.
You’ll also learn how to prevent future damage, ensuring your walls remain beautiful and sturdy for years to come.
Read on to discover everything you need for a successful plaster wall fix.
What Causes Plaster Walls To Crack Or Damage?
Plaster walls can develop cracks and damage due to various factors, including age, wear, moisture, humidity, and structural movement, as well as poor installation methods. Understanding these causes is vital for effective repair processes and methods that can restore the integrity and aesthetics of your walls. Moreover, the type of materials, like plaster, joint compound, and lath, used during installation can significantly influence the longevity of plaster walls. Recognizing these elements helps homeowners and professionals alike to take preventive measures against cracking and sagging.
Age And Wear
As plaster walls age, they naturally experience wear and tear, which can lead to various forms of damage, including cracking and sagging. This deterioration can be particularly pronounced in structures that rely on plaster and lath systems, as the materials used in their construction can weaken over time.
The lath, often made of wood, can become brittle and degrade due to moisture exposure, while the plaster itself may lose its adherence to the lath, resulting in bulging or even dislodging. Homeowners should remain vigilant for potential signs of wear, such as:
- Visible cracks
- Surface flaking
- Bulging sections
To properly address these issues, it’s advisable to consult with a professional who understands the nuances of repairs needed for aged plaster. They can assess the extent of the damage and recommend appropriate restoration techniques to ensure the integrity of the wall remains intact while preserving the home’s character.
Moisture And Humidity
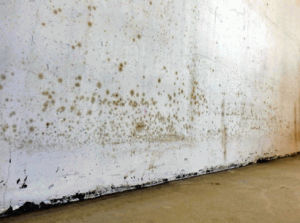
Moisture and humidity can significantly compromise the integrity of plaster walls, leading to problems such as cracking and mold growth.
When assessing the effects of excess moisture, it becomes clear that water damage is not only a structural issue but also a health concern. High humidity levels can lead to a variety of problems, including:
- Cracking – The plaster may begin to crack as it dries unevenly due to excessive moisture.
- Bulging – Walls can warp and bulge, resulting in an unsightly appearance.
- Mold Growth – Standing moisture encourages mold, which can adversely affect indoor air quality and become a health hazard.
To maintain desired humidity levels, it’s essential to employ preventive measures like using dehumidifiers, ensuring proper ventilation in kitchens and bathrooms, and promptly addressing leaks.
By taking these steps, one can protect plaster walls from the detrimental effects of moisture and maintain a healthy living environment.
Structural Movement
Structural movement in a building can cause plaster walls to crack or sag, as the shifting foundation or settling of walls puts undue stress on plaster materials, leading not only to unsightly blemishes but also potentially compromising the overall structural integrity of the home if left unchecked.
When assessing these issues, it’s crucial to look for signs of damage, such as:
- Visible cracks that widen over time
- Changes in door or window functionality
- Uneven surfaces that can indicate underlying structural problems
Homeowners should consider using appropriate repair methods to restore their plaster walls while ensuring durability. Common materials needed for effective repair typically include:
- Plaster patching compound
- Joint tape to reinforce seams
- Primer and paint to blend with existing wall finishes
Understanding the impact of structural movement on plaster walls enables effective assessment and prompt action to prevent further complications.
Poor Installation
Poor installation practices can lead to compromised plaster walls that are more susceptible to damage, including cracking and irregular surfaces, which can not only detract from the visual appeal of a room but also increase maintenance costs over time, making it crucial for homeowners to ensure the job is done correctly to avoid future problems.
When undertaking plaster installation, it’s essential to avoid certain common mistakes that could jeopardize the integrity of the walls. Prioritizing the use of quality materials such as joint compounds and lath is fundamental.
Here are some typical errors to watch out for:
- Inconsistent Mixing: Unevenly mixed joint compound can lead to weak adhesion and an uneven finish.
- Skimping on Layering: Failing to apply adequate layers can result in poorly finished surfaces that are prone to cracks.
- Neglecting Drying Times: Rushing the drying process may trap moisture, causing the finish to deteriorate over time.
Investing in professional installation services is key to ensuring durability and longevity, as these experts understand the meticulous techniques required to achieve a flawless application.
How To Prepare For Plaster Wall Repair
Preparing for plaster wall repair involves gathering the necessary tools and materials, understanding the extent of the damage, and ensuring a clean workspace to facilitate a smooth repair process. Essential tools like utility knives, smoothing tools, and safety goggles are crucial, as well as materials including joint compound, drywall, and adhesive products. Furthermore, knowing the right method for repairs can significantly impact the quality of the finished surface, ensuring that the walls not only look good but are also structurally sound.
Gather The Necessary Tools And Materials
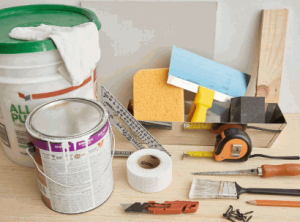
Gathering the right tools and materials is essential for a successful plaster wall repair, with items such as joint compound, smoothing tools, utility knives, and safety goggles topping the list.
Along with those items, it is crucial to consider other essential tools that enhance the repair process, ensuring a professional finish. When tackling a plaster wall repair, one should also have PVA glue on hand, which aids in binding old plaster to new layers effectively.
Utilizing:
- Fiberglass mesh
- construction adhesive
- trowels for smoothing
- sponges for cleanup
can significantly improve the strength and durability of the repairs. The PVA glue acts as a primer, allowing for better adhesion, while the Fiberglass mesh provides reinforcement to areas prone to cracks. Understanding the proper application techniques, such as spreading the joint compound evenly and ensuring the adhesive is fully cured, will lead to a seamless finish that blends with the existing wall.
Gain insights: What Are The Tools Used In Plastering
Clear The Area And Protect Surfaces
Before starting the repair process, it is crucial to clear the area and protect surrounding surfaces to avoid any accidental damage during the plaster repair.
Taking the time to properly prepare the workspace can significantly influence the outcome of the repair and the cleanliness of the surrounding environment. Start by removing any furniture or items from the area, ensuring that the space is entirely unobstructed and safe for full access. Next, protecting surfaces becomes paramount; utilizing drop cloths or plastic sheeting can effectively shield floors and adjacent walls from dust and debris.
- Consider using painter’s tape to secure the edges of the drop cloths, ensuring that they stay in place throughout the repair process.
- Keep a vacuum or broom on hand to manage any mess that may occur, facilitating an efficient cleanup.
- After repairs, check all surfaces for residue and perform a thorough cleanup to restore the area to its original state.
By implementing these measures, not only will you safeguard the integrity of your home, but you’ll also contribute to a smoother repair experience.
Assess The Extent Of Damage
Carefully assessing the extent of damage to plaster walls is a critical step in determining the appropriate repair method and materials needed.
By observing various signs of deterioration, one can get a clearer picture of the necessary interventions. Common issues to look for include:
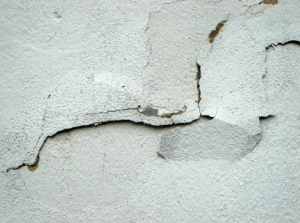
- Cracking: This may range from small hairline fractures to large gaps, indicating underlying movement or settling.
- Sagging: Areas of the wall that appear to be drooping suggest that the plaster has lost its structural integrity due to excess moisture or weight.
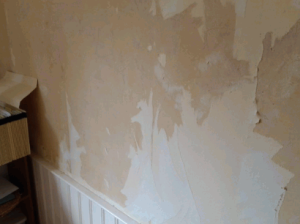
- Loose plaster: If sections of plaster are pulling away from the wall, this could point to moisture problems or inadequate adhesion.
Once these problems are identified, the severity of the damage will guide the choice of repair techniques, from quick fixes like patching for minor cracks to more extensive reinforcement or reapplication for severe issues.
Methods For Repairing Plaster Walls
Effective methods for repairing plaster walls include patching small holes and cracks, reattaching loose plaster, and replacing damaged sections to restore the wall’s integrity and appearance. The choice of method depends on the severity of the damage, with techniques ranging from using joint compounds to applying fiberglass mesh for added strength. Understanding each repair method is essential for achieving a smooth and durable finish that can withstand future wear and moisture.
Patching Small Holes And Cracks
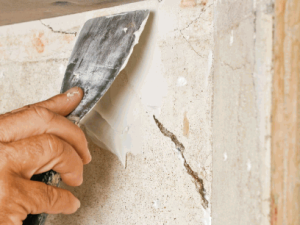
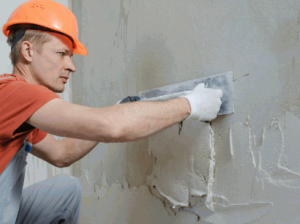
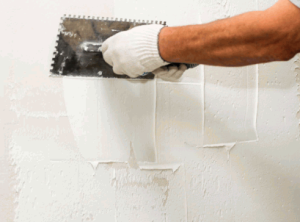
Patching small holes and cracks in plaster walls is a straightforward process that typically involves applying joint compounds to the damaged area, ensuring a smooth finish that blends well with the surrounding surface for a seamless look.
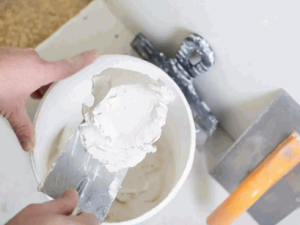
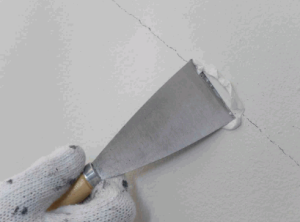
To begin, it’s essential to gather the right tools for the job, including a putty knife, sandpaper, and a primer. Start by preparing the area by cleaning out any loose debris around the hole or crack. Once the patch area is cleaned, apply a thin layer of joint compound using the putty knife, ensuring that it fills the void adequately.
- For larger cracks, consider using fiberglass mesh tape to reinforce the repair.
- Make sure to feather the edges to blend them into the existing plaster.
After applying the compound, allow it to dry completely; this can take anywhere from 24 hours to a few days, depending on the humidity and temperature. Once dry, gently sand the area until smooth, before finally applying a primer to seal the patch. Remember, patience is crucial during this process to achieve a professional finish.
Reattaching Loose Plaster
Reattaching loose plaster involves using screws and washers to secure the plaster back to the underlying lath, ensuring a firm bond and preventing further damage.
To achieve a successful reattachment, one must first identify the areas of plaster that are loose or detaching from the lath beneath. By using a screw and washer technique, the plaster can be firmly anchored, thus avoiding future deterioration.
It’s advisable to gather essential tools such as:
- drywall screws
- flat washers
- drill
- screwdriver
- putty knife
and materials like plaster patch compound to ensure a smooth finish after repairs. Before proceeding, clean any debris from the loose sections to enhance adhesion; this is critical in achieving a long-lasting repair. Spacing the screws evenly will not only distribute weight effectively but also minimize the risk of cracking later on.
Replacing Damaged Sections
Replacing severely damaged sections of plaster may involve cutting out the affected areas and installing new drywall or plaster to restore the wall’s continuity.
To determine the necessity of such replacement, one should first assess the extent of the damage. Visible cracks, holes, or peeling paint can signal underlying issues that require immediate attention.
Begin by identifying the tools needed for this task, including a utility knife, drywall saw, measuring tape, and a straightedge. Once you have your materials ready—such as drywall sheets, joint compound, and tape—follow these steps:
- Carefully outline the damaged area with a straightedge.
- Use the utility knife to cut into the plaster, ensuring precise removal without damaging the surrounding section.
- Once cleared, measure and cut the new drywall to size for fitting.
- Secure the new drywall in place, applying joint compound around the seams.
- Sand and paint to match the existing decor.
This thorough approach will ensure a seamless restoration of the wall’s integrity.
Tips For A Successful Plaster Wall Repair
To ensure a successful plaster wall repair, it’s important to work in small sections, choose the right type of plaster, and allow sufficient drying time for each phase of the repair process. Planning your repair adequately and utilizing the appropriate tools and materials will lead to a smoother surface that is amenable to finishing touches like paint. Moreover, adhering to these tips guarantees a durable outcome that resists future damage and maintains the aesthetic quality of your walls.
Work In Small Sections
Working in small sections during plaster wall repair allows for better control and smoother finishes, ensuring each area receives adequate attention.
By focusing on smaller areas, one can methodically assess the condition of the wall and implement necessary repairs without feeling overwhelmed. This approach minimizes errors, as each section can be thoroughly evaluated for imperfections.
This technique promotes a more organized workspace, making it easier to keep track of tools and materials needed for each part of the wall repair process.
A few key techniques for managing multiple sections simultaneously include:
- Planning each section carefully by sketching a layout of the areas needing work.
- Allocating specific time blocks for each section to avoid rushed jobs and ensure quality.
- Utilizing appropriate tools designed for precision to maintain a consistent texture and finish across different parts.
In doing so, not only is the overall quality of the plastering improved, but the entire repair task becomes a more enjoyable and rewarding experience.
Use The Right Type Of Plaster
Using the right type of plaster, such as joint compound or traditional plaster, is crucial for achieving a seamless repair that adheres properly to the existing surface, ensuring durability and a polished finish that enhances the overall aesthetic of the area being repaired.
Understanding the variety of plaster options available can significantly influence the success of any renovation or repair project. Different types of plaster cater to distinct requirements:
- Joint Compound: Commonly used for drywall projects, it offers a smooth finish and is easy to sand, making it ideal for interior wall repairs.
- Traditional Plaster: This time-tested material is often employed in historical restorations and provides a durable, hard surface, enhancing sound insulation.
- Acrylic-Based Plaster: Suitable for both indoor and outdoor applications, it is resistant to moisture, making it an excellent choice for bathrooms and kitchens.
- Repair Plaster: Specifically formulated for quick fix-ups, it sets rapidly and is perfect for small surface damage.
Selecting the appropriate plaster type not only affects the immediate appearance but also the longevity and resilience of the repair, making it essential to comprehend their unique properties before commencing any project.
Allow Sufficient Drying Time
Allowing sufficient drying time is essential in plaster wall repairs, as it ensures that the materials bond properly and the surface is ready for subsequent layers or painting.
This crucial waiting period isn’t merely a suggestion but rather a vital step that can significantly influence the durability and finish of the repair work. Numerous factors can impact drying time, making it imperative to consider these variables before embarking on a project.
- Humidity levels in the environment can prolong the drying process, as moisture in the air allows the plaster to remain damp longer.
- The temperature of the workspace also plays a fundamental role, with warmer conditions generally encouraging quicker evaporation of the water content.
- As such, a well-ventilated area can facilitate better airflow, enhancing the overall drying speed.
Understanding the interplay of these factors will enable one to effectively plan and execute plaster repair, ensuring optimal results.
How To Prevent Future Damage To Plaster Walls
Preventing future damage to plaster walls involves addressing moisture issues, monitoring structural movement, and ensuring proper installation and maintenance practices are followed. By actively managing the environment in which plaster walls exist, homeowners can reduce the likelihood of cracking, sagging, and other forms of damage that may arise over time. Implementing effective preventive measures not only extends the life of the walls but also enhances their aesthetic appeal, making them an integral part of any home’s interior design.
Address Moisture Issues
Addressing moisture issues in a timely manner is critical to preventing future damage to plaster walls, as excess moisture can weaken the material over time.
Managing moisture levels effectively can significantly enhance the longevity and stability of plaster surfaces. Homeowners can implement simple yet effective strategies to combat excess humidity and its detrimental effects.
- Improving ventilation throughout living spaces not only promotes air circulation but also aids in the natural drying process.
- Utilizing dehumidifiers can help control indoor humidity levels, thus reducing the risk of mold growth and preserving the integrity of plaster walls.
- Regularly checking for leaks in plumbing and roofing is essential to prevent moisture intrusion.
By taking these proactive steps, a homeowner can ensure that their plasterwork remains resilient and visually appealing over time, thus protecting their investment.
Monitor Structural Movement
Regularly monitoring structural movement in your home can help identify potential issues before they lead to serious damage to plaster walls.
By understanding the various signs of movement, homeowners can take proactive steps to safeguard their properties. It’s essential to regularly inspect both the interior and exterior of the home for subtle clues. Pay attention to the following:
- Cracks in walls and ceilings: Vertical cracks can indicate settling, while horizontal cracks may suggest more serious issues.
- Doors and windows that stick or fail to close properly: This can be a sign of frame distortion caused by structural changes.
- Uneven floors: A noticeable slope or bounce may suggest foundation problems.
Utilizing monitoring techniques such as crack gauges or laser leveling can help precisely measure any movement. Regular evaluations by a structural engineer can further ensure that potential issues are detected early, allowing for timely corrective actions to be taken.
Properly Install And Maintain Plaster Walls
Proper installation and regular maintenance of plaster walls are essential for ensuring their durability and minimizing future damage.
The integrity of these surfaces not only relies on quality materials but also on the expertise of skilled laborers who understand the nuances of plaster application. When considering the installation of plaster walls, it’s paramount to select a reputable contractor with extensive experience. This choice directly influences the longevity and durability of the finish.
- Using high-grade plaster and tools is vital.
- Regular inspections can uncover minor cracks before they become major issues.
- Professional maintenance services often recommend sealing and repainting at appropriate intervals to protect the surface.
By prioritizing both the installation process and ongoing upkeep, it’s possible to create a long-lasting aesthetic that enhances the overall beauty of any space.
Conclusion
Understanding the causes of damage to plaster walls, the preparation and methods for repair, and the importance of prevention can significantly extend the life of your walls and enhance the beauty of your home.
When individuals take a closer look at these factors, they unveil a myriad of connections. For instance, moisture and humidity can lead to cracks and peeling, and thus knowing how to properly prepare the wall surface for repairs becomes crucial in ensuring longevity.
- Regular maintenance checks to identify potential issues early are essential.
- Incorporating weather-resistant materials greatly reduces vulnerability.
- Employing appropriate sealing techniques can prevent future deterioration.
By not only addressing the root causes but also implementing effective repair methods and preventive strategies, homeowners can achieve a harmonious balance that protects their investment and maintains aesthetic appeal.

