How To Install Retrofit LED Recessed Lighting
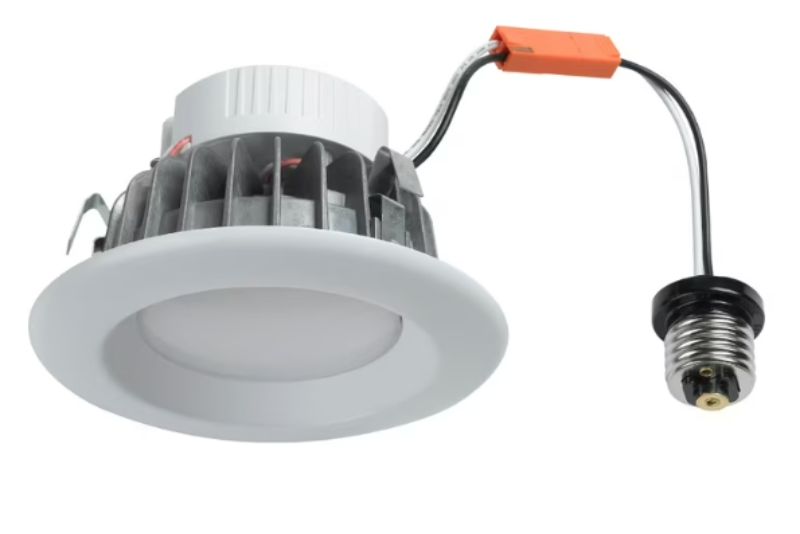
Are you looking to brighten up your space, both interior and exterior, while saving on energy costs? Retrofit LED recessed lighting might be the perfect solution for you!
This guide covers everything you need to know about this energy-efficient lighting option, from understanding what it is to why it’s a smart choice.
It includes a step-by-step installation guide, essential tools needed and materials, safety precautions, and tips for maintaining your new lighting. Additionally, it helps you avoid common DIY mistakes along the way.
Dive in to transform your home with modern, energy-efficient illumination, utilizing state-of-the-art LED technology!
What Is Retrofit LED Recessed Lighting?
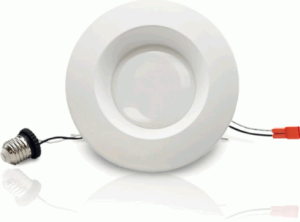
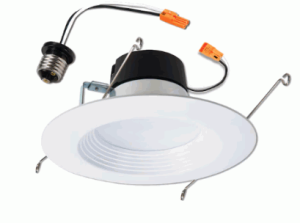
Retrofit LED recessed lighting refers to the process of upgrading existing recessed light fixtures to incorporate advanced LED technology, which not only enhances the illumination but also promotes energy efficiency. This modern lighting solution allows homeowners and businesses to transform their spaces by replacing traditional bulbs with LED downlights, which typically last longer and consume less power, thereby reducing energy consumption significantly. The retrofit process can accommodate various housing types, making it a versatile choice for new constructions or renovations.
Delve into: Are Integrated LED Lights Any Good
Why Choose Retrofit LED Recessed Lighting?
Choosing retrofit LED recessed lighting is a smart decision for anyone looking to enhance their space’s aesthetic while significantly reducing energy consumption. These lights not only offer an extended lifespan compared to traditional lighting solutions, but they also consume less power and emit less heat, making them an energy-efficient option. This versatility allows for easy upgrades, often utilizing existing electrical wiring and minimizing installation hassle, which is ideal for homeowners seeking sustainable options.
What Tools And Materials Do You Need For Installation?
Installing retrofit LED recessed lighting requires specific tools and materials to ensure a smooth and efficient installation process, making it easier for DIY enthusiasts to upgrade their homes. Key tools include a right-angle drill for tight spaces, a center punch for marking, and safety glasses to protect the eyes during work. Other essential materials consist of torsion springs, sheet metal screws, and housing c-clips, which secure the recessed lights in place while ensuring a clean finish.
Step-by-Step Guide For Installing Retrofit LED Recessed Lighting
Installing retrofit LED recessed lighting can seem daunting, but with a clear step-by-step guide, even beginners can achieve a professional result. This process involves several key steps, such as turning off the power to ensure safety, removing old fixtures, and preparing the recessed housing for the new LED downlights. With careful attention to electrical wiring and following a detailed tutorial video, homeowners can confidently navigate this installation process and enjoy their new energy-efficient lighting soon.
Step 1: Turn Off Power
The first critical step in the installation process for retrofit LED recessed lighting is to turn off the power to the circuit where you will be working, ensuring safety and preventing any electrical hazards.
This simple yet essential action not only protects the individual from accidental shocks but also minimizes the risk of damaging the new LED lights during installation. Wearing safety glasses is crucial, as it shields the eyes from any debris or potential hazards that may arise while working, especially if you’re dealing with drywall.
To locate the correct circuit breaker, start by identifying which area of the home the lighting will be installed in. Then follow these steps:
- Check the label on the breaker panel for corresponding circuits.
- Flip the breakers one by one until the lights in the area go off.
- After confirming, clearly label the breaker if it’s not already done.
Once the power is off and the area is secure, the installation can begin with confidence.
Step 2: Remove The Old Recessed Light Fixture
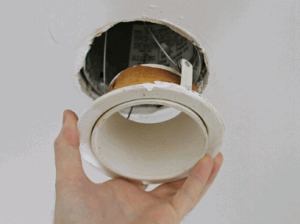
Once the power is off, the next step is to carefully remove the old light fixture, which may involve unscrewing or detaching it from the housing c-clip, depending on the existing setup.
To ensure a smooth transition, it is crucial to handle the electrical wiring with care during this process. Start by examining the fixture closely to identify its type—be it a flush mount, pendant, chandelier, or recessed lights—because this will play a significant role in selecting compatible retrofit recessed lights.
Here are some essential tips to follow:
- Look for screws or clips securing the fixture in place and remove them gently.
- Carefully pull the fixture away from the ceiling while supporting it to prevent any strain on the wiring.
- Make note of the wire connections, typically involving a black wire for hot, white for neutral, and a green or bare wire for ground.
Once the connections are clear, disconnect the wires, ensuring you keep track of which wires connect where for the new installation. This meticulous approach helps prevent accidental damage and ensures safety throughout the replacement process, aided by guidance from an electrical instructor or tutorial video.
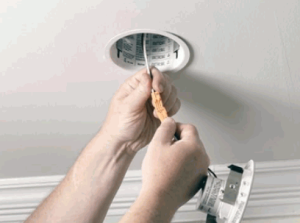
Step 3: Prepare The Recessed Housing
Preparing the recessed housing is essential for a successful retrofit installation, and this step involves inspecting the existing housing c-clip and ensuring it is compatible with the new LED downlights.
Before diving into the installation process, it’s crucial to evaluate the condition of the housing c-clip, which serves as the crucial foundation for securing the new fixtures. Observing any signs of wear, rust, or deformation helps determine if the clip can accommodate the new lights. If adjustments are necessary, consider the following steps:
- Examine the clip’s tension to ensure a snug fit.
- If required, replace any worn-out clips with new ones specifically designed for your housing type.
- Ahead of installation, give the housing a thorough cleaning to remove dust and debris, ensuring optimal performance.
Prepping the recessed light housing not only simplifies the process but also enhances the longevity and efficiency of your recessed lights.
Step 4: Connect Wires
Connecting the wires correctly is a critical step in the installation process for retrofit LED recessed lighting, as it ensures that the new LED technology functions properly and safely.
To begin with, it’s essential to identify the correct wire colors in your setup. Typically, the black wire denotes the live connection, while the white wire is designated for neutral, and the green or bare wire serves as ground. Each of these associations plays a vital role in maintaining a safe electrical connection.
Once the colors are recognized, carefully strip the wire ends to expose about half an inch of copper. When twisting the wires together, make sure to create tight, secure connections to avoid any potential hazards such as shorts or flickering lights. A reliable connection guarantees the optimal performance of your LED lights.
Adhering to electrical safety protocols, including turning off the power at the circuit breaker before starting, cannot be overstressed. This simple precaution protects against electric shock during the process, especially if you’re unfamiliar with specific wiring classes.
- Ensure the power is off
- Identify wire colors
- Strip wires properly
- Make secure connections
- Follow electrical safety protocols
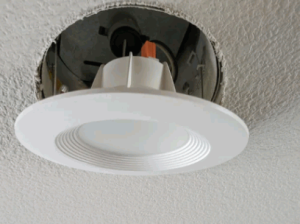
Step 5: Attach Trim And LED Downlight
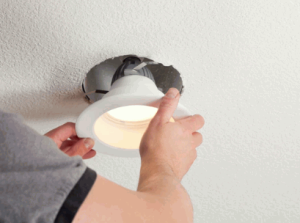
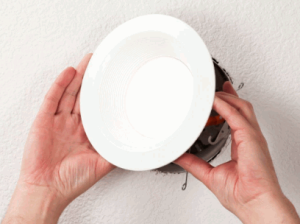
The final step involves attaching the trim and LED downlights securely, utilizing torsion springs or sheet metal screws to ensure a flush and aesthetically pleasing finish.
To achieve a polished appearance, begin by aligning the LED downlight with the ceiling cutout, making sure it is centered.
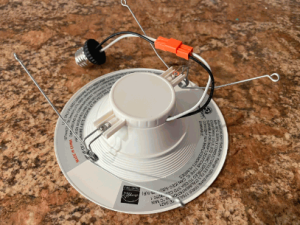
- Next, gently insert the torsion springs into the designated slots, ensuring they are positioned correctly to grip the surrounding material.
- If using sheet metal screws, drill pilot holes for added stability before securing the trim in place.
Take a moment to step back and assess the fit; adjustments can easily be made by loosening the screws or repositioning the springs as necessary.
This process not only guarantees a snug attachment but also enhances the overall visual impact of the lighting in your space, providing both functionality and style.
What Are The Safety Precautions To Take?
When undertaking the installation of retrofit LED recessed lighting, adhering to safety precautions is paramount to prevent accidents and ensure a successful project. Wearing safety glasses is essential to safeguard against debris or electrical shocks and ensuring that all electrical wiring is handled with care can help avoid common DIY mistakes. Proper preparation and awareness of safety protocols will make the process not only smoother but also safer.
Tips For Choosing The Right Retrofit LED Recessed Lighting
Selecting the right retrofit LED recessed lighting can significantly impact both aesthetics and energy efficiency, making it crucial to consider various factors before making a decision. Look for LED downlights that fit your specific needs in terms of brightness, color temperature, and design, while ensuring that they are compatible with your existing retrofit recessed housing and electrical wiring. Energy-efficient options not only save money on utility bills but also contribute to a greener home.
Common Mistakes To Avoid During Installation With Retrofit Kits
Avoiding common mistakes during the installation of retrofit LED recessed lighting is essential for achieving both safety and functionality. Mistakes with electrical wiring or skipping safety precautions like wearing safety glasses can lead to serious hazards and project failure. Proper planning and attention to detail can help ensure a successful installation while minimizing the risk of errors.
How To Maintain Retrofit LED Recessed Lighting?
Maintaining retrofit LED recessed lighting is essential for ensuring long-lasting performance and optimal energy efficiency. Regular inspection and cleaning can help prevent dust buildup that may obstruct light output while keeping an eye on the lifespan of the LED technology and using tools like the Wiz app can help you make timely replacements. By following these maintenance tips, you can preserve the quality and functionality of your energy-efficient lighting.
Conclusion: Enjoy Your New Energy-Efficient Lighting!
Installing retrofit LED recessed lighting is an excellent way to enhance your space while benefiting from the latest LED technology that promotes energy efficiency. By leveraging these innovative lighting solutions, homeowners can create an inviting atmosphere that reflects their personal style while also being mindful of their energy consumption. This upgrade not only adds visual appeal but also significantly lowers electricity bills, creating a win-win situation for both the environment and your wallet.
The versatility of LED lights makes them suitable for various settings, whether it’s a cozy living area, a stylish kitchen, or even a shed. Here are key benefits to consider:
- Energy Efficiency: Retrofit LED lights consume significantly less power than traditional bulbs, making them a favored choice for energy-conscious platforms like Pinterest and YouTube.
- Long Lifespan: These lights typically last up to 25,000 hours, reducing replacement costs.
- Low Heat Emission: LEDs generate less heat, making them safer for enclosed spaces.
By embracing these modern lighting alternatives, you are not only making a smart economic decision but also contributing to a more sustainable future.
Consider upgrading to retrofit LED recessed lighting and LED downlights for a better home experience, enhancing both indoor and outdoor spaces like garden beds!

